
Expert Guide to Split System Installation Techniques
A Comprehensive Guide to Split System Installation
Split System Installation has become increasingly popular in many residential and commercial spaces, offering efficient heating and cooling solutions. Unlike traditional HVAC systems, split systems operate quietly and can be set up without extensive ductwork, making them a suitable choice for various settings. A split system generally includes two main units: an indoor unit, which handles air distribution, and an outdoor condenser unit responsible for cooling or heating the refrigerant. Understanding the installation process is crucial for maximizing the system's performance and longevity.
Before diving into Split System Installation, it is essential to evaluate your space. Identifying the size of the area you need to heat or cool helps in selecting the right capacity for your split system. Utilizing a qualified technician can ensure a proper load calculation is performed. This professional evaluation also assists in determining the best locations for both the indoor and outdoor units to enhance airflow and efficiency. Planning ahead for electrical requirements and ensuring ample space around the units is also a crucial part of the preparation for the installation process.
Many homeowners often wonder how much does it cost to run ducted air conditioning per hour and whether it's worth the investment.
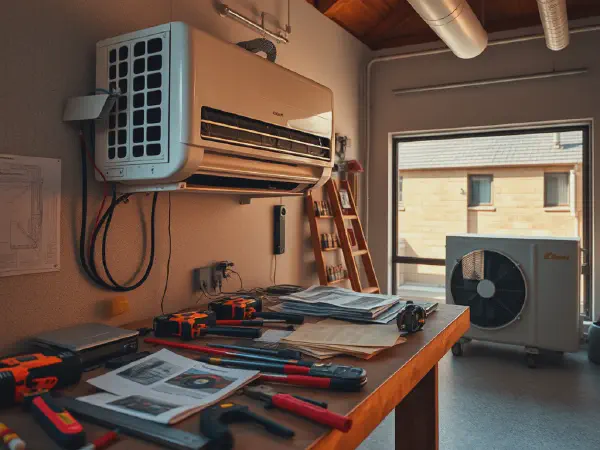
In addition to evaluating your space, understanding the tools and materials required for Split System Installation is vital. The installation typically requires various tools such as a drill, wrenches, a level, and safety equipment. Essential materials include refrigerant lines, electrical wiring, mounting brackets, and the specific components that come with the split system unit. Before beginning the installation, it’s advisable to gather all necessary tools and materials to streamline the process and avoid unnecessary interruptions.
Selecting the best location for the indoor and outdoor units is another critical aspect of Split System Installation. The indoor unit should ideally be mounted high on an interior wall for optimal air circulation, while the outdoor unit should be placed in a well-ventilated area, free of debris and obstructions. It should be located away from direct sunlight and should ensure that the airflow is not restricted. This thoughtful placement aids in the effective operation of the split system and extends the lifespan of the units.
The step-by-step installation process of Split System Installation begins with mounting the indoor unit. This involves securing the mounting bracket to the wall and then attaching the indoor unit to that bracket. Next, connect the refrigerant lines, ensuring there are no kinks or sharp bends that could impede flow. Finally, install the outdoor unit, ensuring it is level and properly secured. A critical part of this installation procedure is ensuring both the indoor and outdoor units are correctly connected to power sources and networked to function seamlessly.
Preparing for Split System Installation
Preparing for Split System Installation involves several essential considerations. First, evaluate your space to determine where the units will be most effective. This includes assessing room dimensions, existing HVAC capabilities, and ensuring there’s suitable space for unobstructed airflow around the units. You will also need to consider the climatic conditions of your area, which may influence the type and size of the split system you will require.
For reliable services in your area, trust the experienced team at dp plumbing.
Understanding the required tools and materials for Split System Installation is crucial for a successful setup. You will need basic tools such as a drill, level, wrenches, and safety glasses to protect your eyes during installation. It's also essential to have the installation kit that accompanies the split system, which typically includes refrigerant lines, mounting brackets, electrical wires, and a user manual. Having everything ready before you start will help refine the installation process and contribute to a faster setup time.
Deciding on the best location for both the indoor and outdoor units cannot be understated. The indoor unit should generally be breezy but out of direct sunlight for maximum efficiency, situated in a location that allows for optimal room air circulation. Conversely, the outdoor unit must be placed in a space that prevents direct exposure to weather elements but provides ample airflow to prevent overheating. It should also be positioned such that maintenance access is convenient and obstruction-free.
Step-by-Step Installation Process
The step-by-step installation process of Split System Installation starts with the indoor unit. First, secure the mounting bracket to the designated position on the wall, ensuring it is level. Once this is achieved, carefully hang the indoor unit on the bracket and ensure it is locked into place. The correct positioning of the indoor unit can significantly affect system efficiency and airflow, making this step critical for successful installation.
Connecting the refrigerant lines is the next important step in Split System Installation. This process requires careful handling to ensure that the lines are connected without any twists or kinks that could impede the refrigerant's flow. It is imperative to tighten all connections properly and check for any visible gaps or leaks. A leak can significantly affect the system's performance and lead to costly repairs, so this step must be undertaken with caution.
After ensuring the indoor unit is installed, the next step is to install the outdoor unit. This involves positioning the unit on a flat, stable surface and securing it adequately. It is crucial to ensure there is no obstruction around the outdoor unit to guarantee proper airflow. The installation needs to be checked for levelness, and once everything is in place, electrical connections should be meticulously made to complete the installation process.
Common Issues During Installation
One of the most common issues during Split System Installation is leaks in the refrigerant lines. Identifying these leaks early in the installation helps prevent significant performance issues later on. To resolve leaks, check all joints and areas where lines are connected tightly and ensure no wear and tear is visible on connectors. Leak detection solutions can also be used to trace problem areas effectively, allowing for prompt repairs.
Addressing electrical wiring problems is another common issue that may arise during installation. Ensure all electrical connections are made correctly, following electrical codes and standards to avoid hazards. If unfamiliar with electrical work, it is advisable to consult a certified technician to ensure the setup is safe and compliant with applicable regulations, especially given the complexities of connecting to your home’s electrical system.
Troubleshooting drainage issues with the indoor unit is equally important to ensure efficient operation. Many split systems require a condensate drain to remove excess moisture, essential for optimal operation. Regularly check the drain lines for clogs or obstructions, and ensure they are clear to allow for proper drainage. If you encounter any persistent drainage issues, consider enlisting a professional to assess the problem and recommend solutions.
Post-Installation Checks and Maintenance
Testing the system for proper operation after installation is one of the most vital steps. This includes checking both the heating and cooling functions to ensure they operate as intended. Observing the airflow, measuring the temperature gradient, and confirming the functioning of the remote control and settings are all critical in this step. A successful test signifies that the Split System Installation has been completed correctly and the system is ready for use.
Cleaning and maintaining split systems is essential for efficiency and longevity. Regular cleaning of the filters, coils, and drainage lines should become part of a maintenance routine to encourage optimal airflow and cooling effectiveness. Depending on the usage, it is generally recommended to clean filters every few months and conduct thorough maintenance checks at least once a year to combat issues effectively and keep the system running smoothly.
Scheduling regular inspections is another key aspect of maintaining a well-functioning split system. Having a professional technician inspect the system on a semi-annual basis can catch potential problems before they escalate. During these inspections, components of the system will be checked for performance, and any necessary parts can be replaced before they lead to costly repairs. This proactive approach will contribute significantly to the longevity of the system and improve energy efficiency.
Energy Efficiency and Split System Installation
Choosing energy-efficient models during Split System Installation can lead to significant savings on energy bills over time. Look for systems that feature advanced technology, quiet operation, and higher efficiency ratings. Energy-efficient models often come with variable-speed compressors that can better regulate temperature and humidity without consuming excessive energy as compared to standard models.
Understanding SEER ratings is crucial when selecting a split system. The Seasonal Energy Efficiency Ratio (SEER) measures a system's cooling output during a typical cooling season divided by the energy it consumes in watt-hours. A higher SEER rating indicates a more efficient unit, which can lower energy costs and contribute to environmental sustainability.
Maximizing efficiency through proper installation techniques is essential for a split system's performance. Installation should follow manufacturer guidelines strictly, and all connections must be checked for fit and function. Proper insulation of refrigerant lines and minimizing any bends or twists can improve overall system efficiency. By investing time in correct installation methods, users can enhance energy efficiency and reap long-term benefits of reduced operational costs and enhanced comfort.